分类 linux服务器 下的文章

安装MySql 5.7 教程

1、下载MySQL安装包:

wget http://dev.mysql.com/get/Downloads/MySQL-5.7/mysql-5.7.17.tar.gz

2、安装依赖包:

MacOX: brew install cmake
       brew install boost
       brew install homebrew/dupes/ncurses
LINUX: yum -y install cmake  
       yum -y install bison  
       yum -y install ncurses-devel  

mysql5.7.1.jpg

mysql5.7.2.jpg

3、解压mysql安装包 并编译安装

#创建mysql用户以及相关目录
groupadd mysql              #所以在这里我们要建一个msyql的用户和组   
useradd -g mysql mysql -s /usr/sbin/nologin   
mkdir /usr/local/mysql5.7           #创建目录   
mkdir /usr/local/mysql5.7/data

$ tar -zxf mysql-5.7.17.tar.gz
$ cd mysql-5.7.17
$ cmake -DCMAKE_INSTALL_PREFIX=/usr/local/mysql5.7 -DDOWNLOAD_BOOST=1 -DWITH_BOOST=/usr/local/Cellar/boost/1.62.0 -DMYSQL_UNIX_ADDR=//usr/local/mysql5.7/data/mysql.sock -DMYSQL_USER=mysql -DEXTRA_CHARSETS=all -DDEFAULT_CHARSET=utf8 -DDEFAULT_COLLATION=utf8_general_ci -DWITH_MYISAM_STORAGE_ENGINE=1 -DWITH_INNOBASE_STORAGE_ENGINE=1 -DWITH_DEBUG=0 -DWITH_READLINE=1
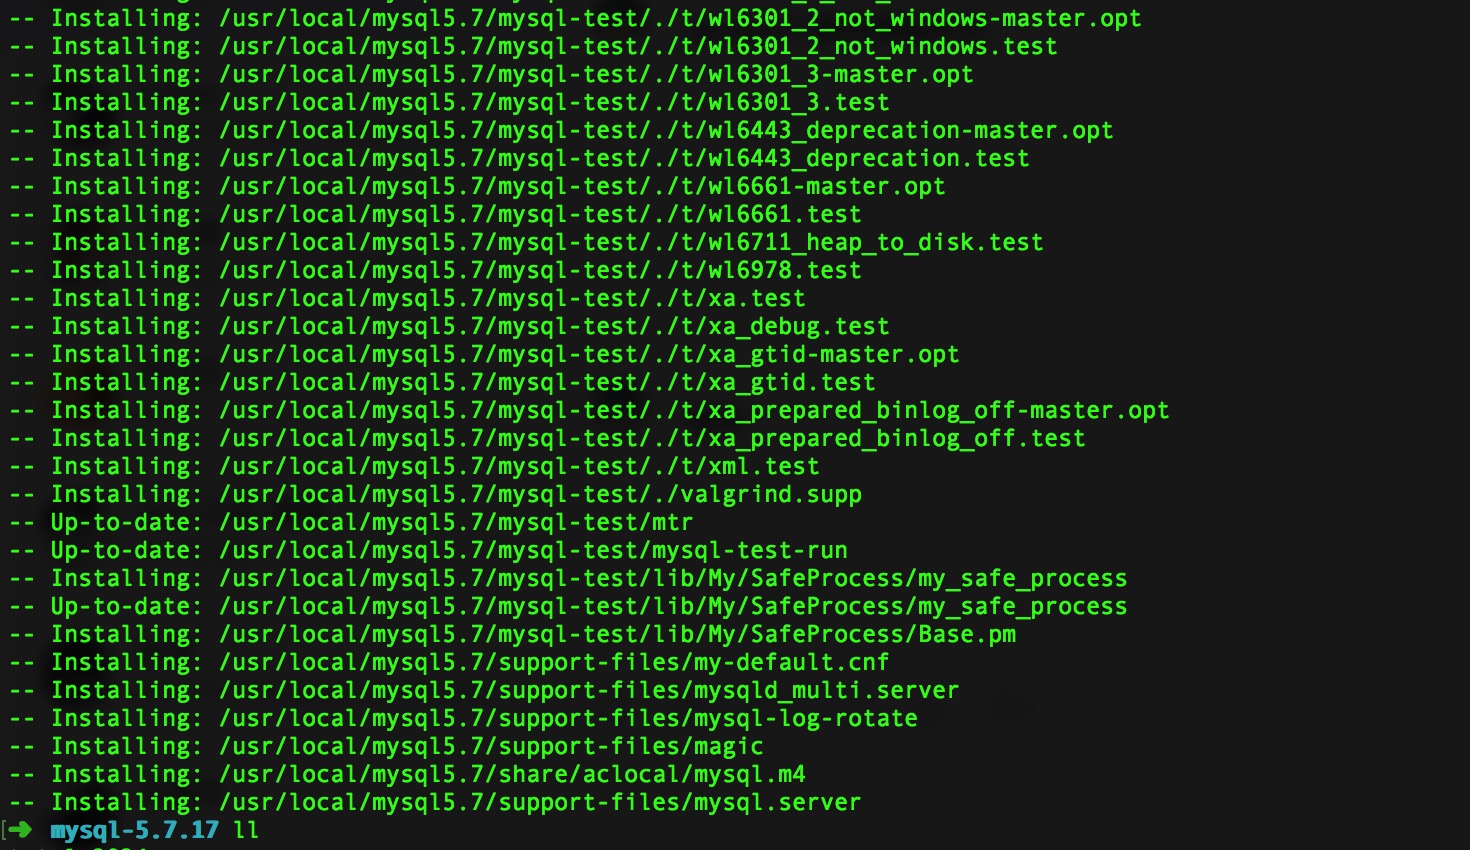
#编译完成后开始安装
sudo make && make install 

4、安装成功后 配置MySQL
mysql5.7.3.jpg

#复制默认配置文件到 MySQL安装根目录下
sudo cp support-files/my-default.cnf /usr/local/mysql5.7/my.cnf
sudo vim /usr/local/mysql5.7/my.cnf

#配置文件内容
# For advice on how to change settings please see
# http://dev.mysql.com/doc/refman/5.7/en/server-configuration-defaults.html
# *** DO NOT EDIT THIS FILE. It's a template which will be copied to the
# *** default location during install, and will be replaced if you
# *** upgrade to a newer version of MySQL.

[mysqld]

# Remove leading # and set to the amount of RAM for the most important data
# cache in MySQL. Start at 70% of total RAM for dedicated server, else 10%.
# innodb_buffer_pool_size = 128M

# Remove leading # to turn on a very important data integrity option: logging
# changes to the binary log between backups.
# log_bin

# These are commonly set, remove the # and set as required.
basedir =/usr/local/mysql5.7/
datadir =/usr/local/mysql5.7/data
log-error =/usr/local/mysql5.7/log/mysql.err
pid-file =/usr/local/mysql5.7/mysql.pid
port =3309
#server_id = .....
socket =/usr/local/mysql5.7/data/mysql.sock

# Remove leading # to set options mainly useful for reporting servers.
# The server defaults are faster for transactions and fast SELECTs.
# Adjust sizes as needed, experiment to find the optimal values.
join_buffer_size = 128M
sort_buffer_size = 2M
read_rnd_buffer_size = 2M

sql_mode=NO_ENGINE_SUBSTITUTION,STRICT_TRANS_TABLES
#skip-grant-tables

#保存配置文件后 初始化数据库
bin/mysqld --initialize --basedir=/usr/local/mysql5.7/ --datadir=/usr/local/mysql5.7/data --user=_mysql

5、启动MySQL服务

sudo support-files/mysql.server start
如果启动报错 请修改 /usr/local/mysql5.7 根目录 /usr/local/mysql5.7/log 和 /usr/local/mysql5.7/data 文件夹权限 和 拥有者为 _mysql

6、修改默认密码

sudo vim my.cnf # 将其中的 skip-grant-tables 选项前 # 好去掉 保存并退出
sudo support-files/mysql.server restart 重启MySQL服务
#进入MySQL 
bin/mysql -uroot -p -P3309 -S/usr/local/mysql5.7/data/mysql.sock
#修改默认密码 并新建用户
UPDATE user SET authentication_string = password('123456') WHERE User = 'root';
flush privileges;
#新建用户
SET PASSWORD = PASSWORD('123456'); # root 用户密码
CREATE USER 'jiazhizhong'@'%' IDENTIFIED BY 'jia980709'; 
GRANT ALL ON *.* TO 'jiazhizhong'@'%';
flush privileges;
exit;
#重新启动MySQL服务
sudo support-files/mysql.server restart 

7、MySQL安装中遇到的错误 及 解决办法
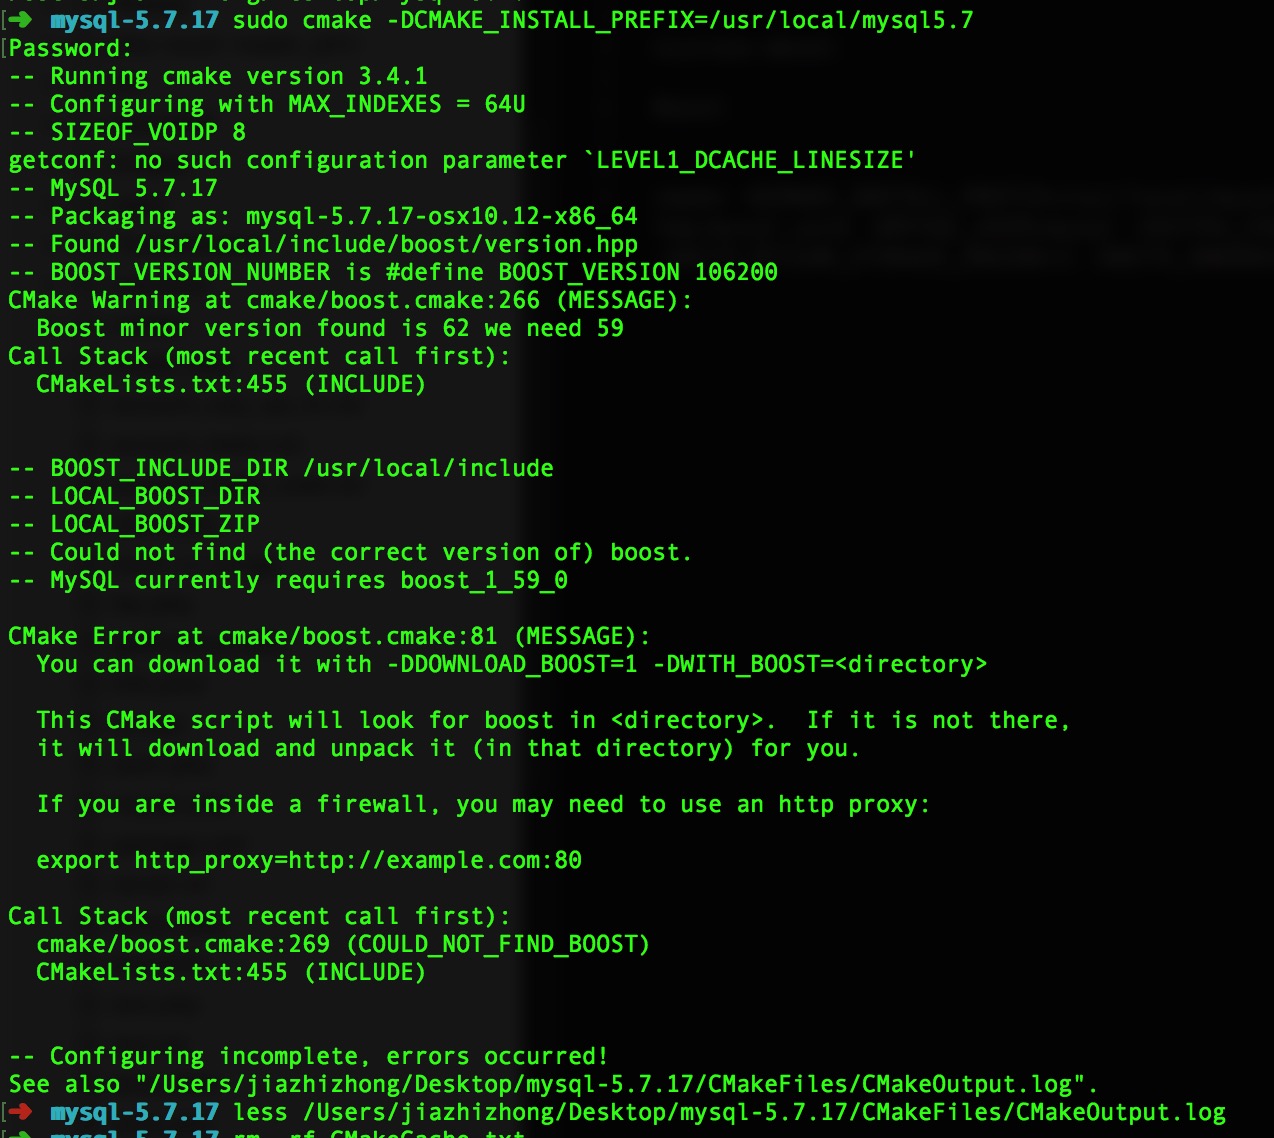
7.1、遇到这个错误 是你没安装 boost 或没指定 boost 路径 (-DDOWNLOAD_BOOST=1 -DWITH_BOOST=/usr/local/Cellar/boost/1.62.0)
mysql5.7 安装.jpg

7.2、遇到下面这个错误是在 执行 mysql -uroot -p123456 命令或者是重启MySQL服务时遇到,将 my.cnf 文件中 socket 地址配置正确即可
    **Can’t connect to local MySQL server through socket ‘/tmp/mysql.sock**

7.3、这个错误是在命令行下登录进入MySQL后执行sql语句时报错,这个错误需要你执行 (SET PASSWORD = PASSWORD('123456'); # root 用户密码)这条sql 设定下root密码即可
    **ERROR 1820 (HY000): You must reset your password using ALTER USER statement before executing this statement.**

8、查看MySQL配置文件路径

#如果是linux系统,使用:

#第一种
sudo find / -name my.cnf
#第二种
sudo mysql --help | grep my.cnf

MYsql主从复制与同步

①主服务器配置:
打开MySQL配置文件my.cnf,在[mysqld]下面添加以下参数:

log-bin=mysql-bin //开启MYSQL二进制日志
server-id=1 //服务器ID不能重复
expire-logs-days = 7 //只保留7天的二进制日志,以防磁盘被日志占满

修改完配置文件后进入主数据库执行以下命令:

(1)、GRANT REPLICATION SLAVE ON *.* TO 'rep'@'192.168.1.3' IDENTIFIED BY '123';
(2)、show master status;

②从服务器配置:

打开MySQL配置文件my.cnf,修改在[mysqld]下面的参数:

将 server-id=1 改为 server-id=2

修改完配置文件后进入从数据库执行以下命令:

(1)、change master to master_host='192.168.86.128', master_user='reps', master_password='123', master_log_file='mysql-bin.000004', master_log_pos=563; 登录从库的MySQL
(2)、slave start; //启动从库连接
(3)、show slave status\G; //查看连接情况,是不是两个YES,两个YES为成功

ssh免登录配置

设置SSH公钥认证(不需要每次都输入口令)方法

本地机器(192.168.0.240):

$ssh-keygen -t dsa

注意:密码(passphrase)设为空(要求输入密码时直接按"Enter"键)

再把生成的id_dsa.pub(公共密钥保)拷贝到你要访问的机器上去并保存为authorized_keys.
$scp /home/zengxiaolong/.ssh/id_dsa.pub jiazhizhong@192.168.0.239:~/.ssh/authorized_keys

注: 远端机器(239)需要以jiazhizhong身份使用ssh进行过远程登录!

本地机器(192.168.0.240):

$ssh jiazhizhong@192.168.0.239
如果没有提示让输入密码,那就OK!

注: 不需输入密码
jiazhizhong ------------> jiazhizhong
192.168.0.240 192.168.0.239

做了以上配置后,在本地机器执行scp的时候按tab,就可以自动补齐你要访问的机器上的目录名(只可惜反应速度慢,需要耐心等待,似乎意义不是很大)

注:authorized_keysk已经存在被授权的机器,别把之前的覆盖掉

Google Authenticator配置SSH登录动态验证码

                            **Google Authenticator配置SSH登录动态验证码**

需求说明:
1、一般ssh登录服务器,只需要输入账号和密码。
2、本教程的目的:在账号和密码之间再增加一个验证码,只有输入正确的验证码之,再输入密码才能登录。这样就增强了ssh登录的安全性。
3、账号、验证码、密码三者缺一个都不能登录,即使账号和密码正确,验证码错误,同样登录失败。
4、验证码:是动态验证码,并且是通过手机客户端自动获取(默认每隔30秒失效一次)
5、最终目的:远程ssh登录一台服务器,需要正确的账号、密码、及一个可以获取到动态验证码的手机(目前支持Android和ios手机系统)
具体操作:
操作系统:CentOS
一、关闭SELINUX
vi /etc/selinux/config
#SELINUX=enforcing #注释掉
#SELINUXTYPE=targeted #注释掉
SELINUX=disabled #增加
:wq! #保存退出
setenforce 0 #使配置立即生效
二、安装编辑工具包
1、使用CentOS默认yum源安装
yum install wget gcc make
yum install pam-devel libpng-devel
2、配置repoforge第三方yum源安装mercurial包
CentOS各个版本,请选择正确版本
CentOS 5.x
rpm -ivh http://pkgs.repoforge.org/rpmforge-release/rpmforge-release-0.5.3-1.el5.rf.i386.rpm
rpm -ivh http://pkgs.repoforge.org/rpmforge-release/rpmforge-release-0.5.3-1.el5.rf.x86_64.rpm
CentOS 6.x
rpm -ivh http://pkgs.repoforge.org/rpmforge-release/rpmforge-release-0.5.3-1.el6.rf.i686.rpm
rpm -ivh http://pkgs.repoforge.org/rpmforge-release/rpmforge-release-0.5.3-1.el6.rf.x86_64.rpm
yum install mercurial #安装
3、安装依赖包
在 Debian、 Ubuntu 或 Linux Mint 上:
sudo apt-get install wget make gcc libpam0g-dev
在 CentOS、 Fedora 或 RHEL上:
sudo yum install wget make gcc pam-devel

三、安装google authenticator PAM插件
cd /usr/local/src
下载 libpam-google-authenticator-1.0-source.tar.bz2 包 “http://yun.recallg.cn/s/cpOtuBKBEp8WEXV”
注意:打开google需要翻墙,可以先想办法下载好libpam-google-authenticator-1.0-source.tar.bz2上传到/usr/local/src目录进行安装,下载不了请留邮箱!
tar jxvf libpam-google-authenticator-1.0-source.tar.bz2 #解压
cd libpam-google-authenticator-1.0 #进入目录
make #编译
make install #安装
四、安装QrenCode,此工具可以在Linux命令行下生成二维码
cd /usr/local/src
wget http://fukuchi.org/works/qrencode/qrencode-3.4.4.tar.gz #下载
tar zxf qrencode-3.4.4.tar.gz #解压
cd qrencode-3.4.4 #进入目录
./configure --prefix=/usr #配置
make #编译
make install #安装
五、配置ssh服务调用google authenticator PAM插件
vi /etc/pam.d/sshd #编辑,在第一行增加以下代码
auth required pam_google_authenticator.so
:wq! #保存退出
vi /etc/ssh/sshd_config #编辑
ChallengeResponseAuthentication yes #修改no为yes
:wq! #保存退出
service sshd restart #重启ssh服务,使配置生效
六、使用google authenticator PAM插件为ssh登录账号生成动态验证码
注意:哪个账号需要动态验证码,请切换到该账号下操作
google-authenticator #运行此命令
Do you want authentication tokens to be time-based (y/n) y #提示是否要基于时间生成令牌,选择y

https://www.google.com/chart?chs=200x200&chld=M|0&cht=qr&chl=otpauth://totp/osyunwei@osyunwei%3Fsecret%3DAXNRWARYQPHI5EAJ
Your new secret key is: AXNRWARYQPHI5WYU ###复制这一窜密钥 Your
verification code is 199255 Your emergency scratch codes are: 21767982
60638828
24009000
44681673
28015662

#上面的网址为生成的二维码图形地址(需要翻墙才能打开),还会生成密钥,以及5个紧急验证码(当无法获取动态验证码时使用,注意:这5个验证码用一个就会少一个!请保存好!)
Do you want me to update your "/home/jss/.google_authenticator" file (y/n) y #提示是否要更新验证文件,选择y

Do you want to disallow multiple uses of the same authentication
token? This restricts you to one login about every 30s, but it increases

your chances to notice or even prevent man-in-the-middle attacks (y/n) y #禁止使用相同口令

By default, tokens are good for 30 seconds and in order to compensate
for possible time-skew between the client and the server, we allow an
extra token before and after the current time. If you experience
problems with poor time synchronization, you can increase the window from its default

size of 1:30min to about 4min. Do you want to do so (y/n) n
#默认动态验证码在30秒内有效,由于客户端和服务器可能会存在时间差,可将时间增加到最长4分钟,是否要这么做:这里选择是n,继续默认30秒

If the computer that you are logging into isn't hardened against
brute-force login attempts, you can enable rate-limiting for the
authentication module. By default, this limits attackers to no more than 3 login attempts every 30s.

Do you want to enable rate-limiting (y/n) y
#是否限制尝试次数,每30秒只能尝试最多3次,这里选择y进行限制

七、手机安装Google身份验证器,通过此工具扫描上一步生成的二维码图形,获取动态验证码
Android手机下载:
https://play.google.com/store/apps/details?id=com.google.android.apps.authenticator2
iOS手机下载:##手机应用市场输入身份验证器也可以搜到
https://itunes.apple.com/us/app/google-authenticator/id388497605
注意:打开google需要翻墙,或者自己想办法下载Google身份验证器安装。
另外,还需要安装条形码扫描器,用来扫描验证二维码,以获取动态验证码
以Android手机为例:

安装好Google身份验证器,输入刚才密钥,打开如下图所示:
123.png

八、ssh远程登录服务器
输入账号之后,会提示输入验证码
login as: root
Using keyboard-interactive authentication.
Verification code:
打开手机上的Google身份验证器,输入动态验证码,回车。
注意:动态验证码没有回显,所以在屏幕上看不到输入的内容,但只要保证输入正确即可!
Using keyboard-interactive authentication.
Password:
接着输入密码,即可成功登录系统!
注意:以此步骤必须在30秒内完成。否则动态验证码过期,必须重新操作。

至此,Linux下使用Google Authenticator配置SSH登录动态验证码教程完成!

MySQL 8.0.0 开发里程碑版发布

MySQL 8.0源码下载 : https://github.com/mysql/mysql-server/tree/8.0

MySQL 开发团队于 12 日宣布 MySQL 8.0.0 开发里程碑版本(DMR)发布! 可能有人会惊奇 MySQL 为何从 5.x 一下跳跃到了 8.0。事实上,MySQL 5.x 系列已经延续了很多年,从被 Oracle 收购之前就是 5.1,而收购之后一直维持在 5.x,比如 5.5,5.6,5.7 等等。其实,如果按照原本的发布节奏,可以把 5.6.x 当成 6.x,5.7.x 当成 7.x。所以,只是换了版本命名方式而已。

mysql.jpg

不过这次发布的 MySQL 8.0.0 开发版本还是有不少亮点的。
MySQL 8.0.0 亮点
事务性数据字典,完全脱离了 MyISAM 存储引擎
真正将数据字典放到了 InnoDB 中的一些表中,从此不再需要 FRM、TRG、PAR 文件啦!Information Schema 现在以数据字典表的一个视图出现。原则上可以完全不需要 MyISAM 数据表类型了,所有的系统表都可以放到 InnoDB 之中。
SQL 角色
角色是一系列权限的集合。可以创建角色,给某个用户授予和去除角色。这对于权限管理很方便。
utf8mb4 字符集将成为默认字符集,并支持 Unicode 9
默认字符集将从 latin1 改为 utf8mb4,默认定序collation将从latin1_swedish_ci 改为 utf8mb4_800_ci_ai。
不可见索引
可以将一些索引设置为不可见,这样 SQL 优化器就不会用到它,但是它会继续在后台保持更新。当有需要时,可以随时恢复可见。
对二进制数据可以进行位操作
不仅仅可以对 BIGINT进行位操作,从 8.0 开始也支持对 [VAR]BINARY/[TINY|MEDIUM|LONG]BLOB进行位操作了。
改进了对 IPv6 和 UUID 的操作
INET6_ATON() 和 INET6_NTOA() 现在可以进行位操作了,因为INET6_ATON()现在返回的是VARBINARY(16) 数据类型(128 位)。改进了 UUID 操作,引入了三个新的函数 UUID_TO_BIN(), BIN_TO_UUID()和 IS_UUID() 。MySQL 并没有特殊的 IPv6 和 UUID 数据类型,而是以VARBINARY(16) 数据类型保存的。
持续性的全局变量
可以用 SET PERSIST 来设置持久性的全局变量,即便
服务器
重启也会保持下来。
性能数据库Performance Schema的改进
比如对性能数据库增加了 100 多个索引,可以检索更快。
重构 SQL 分析器
持续不断的逐步改进 SQL 分析器。旧的分析器由于其语法复杂性和自顶向下的分析方式从而有严重的限制,导致难以维护和扩展。
成本模型
InnoDB 缓冲区现在可以估算主内存缓存区中的有多少表和索引,这可以让优化器选择访问方式时知道数据是否可以存储在内存中还是必须存储到磁盘上。
直方图Histograms通过使用直方图,用户或 DBA 可以对数据分布进行统计,这可以用于查询优化以寻找优化的查询方案。
改进扫描性能
改进了 InnoDB 范围查询的性能,可提升全表查询和范围查询 5-20% 的性能。
重构 BLOB
重构 BLOB 加速了片段读取/更新操作,可以加速 JSON 数据的操作。
持久化自增值
InnoDB 会持久化保持自增序列的最大值到 redo 日志中。这个改进还修复了一个非常老的 199 号 bug。
临时表
取消对压缩临时表的支持,并存储临时表的元数据到内存中。
其它的更多重要改进和细节,请参考 MySQL 8.0.0发布公告1和这里2
下载
目前 8.0.0 还是开发版本,如果你希望体验和测试最新特性,可以从dev.mysql.com[3] 下载各个平台的安装包。不过,MySQL 软件包是越来越大了,Linux 平台上的二进制打包后就将近有 1 GB。如果在产品环境中使用,在 8.0 没有进入稳定版本之前,请继续使用 5.7 系列,当前最新的版本是 5.7.15 GA 版本——这只有 600 M 多。
最新的源代码放在GitHub上,感兴趣的朋友可以去看看,其中有不少是中国人的贡献。