jiazhizhongphp@163.com 发布的文章

Yearning SQL审核平台安装

相关依赖

  • python >= 3.6
  • node >= 6.10 (仅开发模式安装)
  • nginx
  • mysql >= 5.6
  • Inception

安装

注意

Yearning 采用的是动静分离架构,为了接口安全后端接口并不对全域开放。
所以存在跨域的问题,请仔细阅读以下 配置文件说明!如配置错误将无法正常登陆!
本文档只介绍Yearning相关安装配置,对于Inceotion相关配置需自行添加。如只配置了Yearning却没有配置Inception则    仍然无法正常工作。所以请确保自己已熟读inception相关文档

生产模式安装(推荐):

安装 nginx mysql python3.6 (nginx,mysql推荐yum安装。python3.6官方自行下载安装)
安装Inception(install目录下有已经编译好的Inception可以直接运行)
建立数据库 (库字符集必须为UTF8或utf8mb4,不然会有未知错误)
git clone https://github.com/cookieY/Yearning.git
编辑 Yearning/src/deploy.conf


[mysql]
db = 所创建的库名
address = 数据库地址
port = 数据库端口
password = 数据库密码
username = 数据库用户

[host]
ipaddress = 服务器ip地址:端口 (涉及跨域十分重要!!设置不正确将无法登陆!!)
        例如 本机地址为192.168.1.2 nginx端口为80(端口可自己定义,定义什么端口就填写什么端口)
        则应填写为 192.168.1.2:80 之后只能通过该地址访问平台其他地址一概无效!
        注意!访问的是nginx的端口不是后端8000端口!

[Inception]
ip = Inception地址
port = Inception端口
user = Inception用户名
password  = Inception密码
backupdb = 备份数据库地址
backupport = 备份数据库端口
backupuser = 备份数据库用户名
backuppassword = 备份数据库密码

[LDAP] LDAP相关设置
LDAP_SERVER = LDAP服务地址
LDAP_SCBASE = LDAP dc 设置 如 dc=xxx,dc=com
LDAP_DOMAIN = LDAP域名 如 xxx.com
LDAP_TYPE = 1  1 通过域名进行ldap认证  2 通过uid进行ldap认证 3 通过cn进行ldap认证

[email] 邮箱推送相关设置
username = 邮箱发件账号 如 xxxx@163.com
password = 邮箱发件账号密码
smtp_server = 邮箱stmp地址, 具体地址请咨询对应邮箱提供者

[sql]

limit = 100 查询最高的Limit数量

[webhook]

dingding =  权限提交,查询工单等其他非sql工单提交消息推送钉钉webhook

开始安装

pip3 install -r requirements.txt 安装相应python依赖库

python3 manage.py makemigrations core && python3 manage.py migrate core 初始化数据库

echo "from core.models import Account;Account.objects.create_user(username='admin',         password='Yearning_admin', group='admin',is_staff=1)" | python3 manage.py shell 添加初始化用户

echo "from core.models import grained;grained.objects.get_or_create(username='admin', permissions={'person': [], 'ddl': '1', 'ddlcon': [], 'dml': '1', 'dmlcon': [], 'dic': '1', 'diccon': [], 'dicedit': '0', 'user': '1', 'base': '1', 'dicexport': '0'})" | python3 manage.py     shell 初始化权限

注意: 对于v1.1.2以下的版本 permissions={}内还需添加'query': '1', 'querycon': []

cp -rf Yearning/webpage/dist/* $NGINX_HOME/html/   复制编译好的静态文件到nginx html目录下(如自行更改Nginx静态路径地址则将静态文件复制到对应静态文件目录下)

systemctl start nginx  启动nginx

python3 manage.py runserver 0.0.0.0:8000 启动django

访问deploy.conf 配置文件中ipaddress 填写的地址

默认账号: admin  密码:Yearning_admin

注意事项

  • 默认超级管理用户只拥有管理页面的访问权限,其他的权限需自行增加!详情请查看使用说明用户管理
  • 由于Inception 并不原生支持pymysql,所以需更改pymysql相关源码
  • 注: 在install 文件夹下有已经修改的connections.py 和 cursors.py 直接替换即可
  • 修改 $PYTHON_HOME/lib/python3.6/site-packages/pymysql下

connections.py 和 cursors.py 两个文件
找到 connections.py 1108行

if int(self.server_version.split('.', 1)[0]) >= 5:
        self.client_flag |= CLIENT.MULTI_RESULTS

更改为

try:
    if int(self.server_version.split('.', 1)[0]) >= 5:
        self.client_flag |= CLIENT.MULTI_RESULTS
except:
    if self.server_version.split('.', 1)[0] >= 'Inception2':
        self.client_flag |= CLIENT.MULTI_RESULTS

找到 cursors.py 345行

if self._result and (self._result.has_next or not self._result.warning_count):
    return

更改为

if self._result:
    return

Inception启动问题
如果启动失败报错如下:

libssl.so.10: cannot open shared object file: No such file or directory

解决办法:

  • 先下载安装一次openssl

  • 下载:https://www.openssl.org/source/old/1.0.1/openssl-1.0.1e.tar.gz

  • 执行./config shared zlib-dynamic 来生成Makefile文件。

  • 通过make来生成生成libssl.so.1.0.0和libcrypto.so.1.0.0

  • 将这2个文件拷贝到cd /usr/lib/,然后执行以下2条生成软连接解决。

     ln -s libssl.so.1.0.0          libssl.so.10
     ln -s libcrypto.so.1.0.0    libcrypto.so.10
    

laravel5.5 配置七牛上传文件

基于 https://github.com/qiniu/php-sdk 开发
符合Laravel 5 的Storage用法。

更新

  • v0.5 增加了QiniuUrl来更方便的设置文件 URL 参数。
  • v0.3 增加了对PIPE以及回调地址参数的配置。 感谢abcsun提供的灵感。
  • v0.2 提供了对多域名的支持。这是为了配合七牛的默认域名、HTTPS域名和自定义域名而添加的功能。

安装

  • composer require zgldh/qiniu-laravel-storage

  • config/app.php 里面的 providers 数组, 加上一行 zgldh\QiniuStorage\QiniuFilesystemServiceProvider

  • config/filesystem.php 里面的 disks数组加上:

     'disks' => [
         ... ,
         'qiniu' => [
             'driver'  => 'qiniu',
             'domains' => [
                 'default'   => 'xxxxx.com1.z0.glb.clouddn.com', //你的七牛域名
                 'https'     => 'dn-yourdomain.qbox.me',         //你的HTTPS域名
                 'custom'    => 'static.abc.com',                //你的自定义域名
             ],
             'access_key'=> '',  //AccessKey
             'secret_key'=> '',  //SecretKey
             'bucket'    => '',  //Bucket名字
             'notify_url'=> '',  //持久化处理回调地址
         ],
     ],
    
  • 完成

使用

第一种用法

$disk = \Storage::disk('qiniu');
$disk->exists('file.jpg');                      //文件是否存在
$disk->get('file.jpg');                         //获取文件内容
$disk->put('file.jpg',$contents);               //上传文件
$disk->put('file.jpg',fopen('path/to/big.jpg','r+')); //分段上传文件。建议大文件>10Mb使用。 
$disk->prepend('file.log', 'Prepended Text');   //附加内容到文件开头
$disk->append('file.log', 'Appended Text');     //附加内容到文件结尾
$disk->delete('file.jpg');                      //删除文件
$disk->delete(['file1.jpg', 'file2.jpg']);
$disk->copy('old/file1.jpg', 'new/file1.jpg');  //复制文件到新的路径
$disk->move('old/file1.jpg', 'new/file1.jpg');  //移动文件到新的路径
$size = $disk->size('file1.jpg');               //取得文件大小
$time = $disk->lastModified('file1.jpg');       //取得最近修改时间 (UNIX)
$files = $disk->files($directory);              //取得目录下所有文件
$files = $disk->allFiles($directory);               //这个没实现。。。
$directories = $disk->directories($directory);      //这个也没实现。。。
$directories = $disk->allDirectories($directory);   //这个也没实现。。。
$disk->makeDirectory($directory);               //这个其实没有任何作用
$disk->deleteDirectory($directory);             //删除目录,包括目录下所有子文件子目录

$disk->getDriver()->uploadToken('file.jpg');                //获取上传Token
$disk->getDriver()->downloadUrl('file.jpg');                //获取下载地址
$disk->getDriver()->downloadUrl('file.jpg')
                  ->setDownload('foo.jpg');                 //获取下载地址,文件名为 foo.jpg
$disk->getDriver()->downloadUrl('file.jpg', 'https');       //获取HTTPS下载地址
$disk->getDriver()->privateDownloadUrl('file.jpg');         //获取私有bucket下载地址
$disk->getDriver()->privateDownloadUrl('file.jpg', 'https');//获取私有bucket的HTTPS下载地址
$disk->getDriver()->privateDownloadUrl('file.jpg', 
                                    [
                                        'domain'=>'https',
                                        'expires'=>3600
                                    ]);                     //获取私有bucket的HTTPS下载地址。超时 3600 秒。
$disk->getDriver()->imageInfo('file.jpg');                  //获取图片信息
$disk->getDriver()->imageExif('file.jpg');                  //获取图片EXIF信息
$disk->getDriver()->imagePreviewUrl('file.jpg','imageView2/0/w/100/h/200');                         //获取图片预览URL
$disk->getDriver()->privateImagePreviewUrl('file.jpg','imageView2/0/w/100/h/200');                  //获取私有bucket图片预览URL
$disk->getDriver()->verifyCallback('application/x-www-form-urlencoded', $request->header('Authorization'), 'callback url', $request->getContent());//验证回调内容是否合法
$disk->getDriver()->persistentFop('file.flv','avthumb/m3u8/segtime/40/vcodec/libx264/s/320x240');   //执行持久化数据处理
$disk->getDriver()->persistentFop('file.flv','fop','队列名');   //使用私有队列执行持久化数据处理
$disk->getDriver()->persistentStatus($persistent_fop_id);       //查看持久化数据处理的状态。

第二种用法 (就是省略了一个getDriver)

use zgldh\QiniuStorage\QiniuStorage;

$disk = QiniuStorage::disk('qiniu');
$disk->exists('file.jpg');                      //文件是否存在
$disk->get('file.jpg');                         //获取文件内容
$disk->put('file.jpg',$contents);               //上传文件
$disk->put('file.jpg',fopen('path/to/big.jpg','r+')); //分段上传文件。建议大文件>10Mb使用。
$disk->prepend('file.log', 'Prepended Text');   //附加内容到文件开头
$disk->append('file.log', 'Appended Text');     //附加内容到文件结尾
$disk->delete('file.jpg');                      //删除文件
$disk->delete(['file1.jpg', 'file2.jpg']);
$disk->copy('old/file1.jpg', 'new/file1.jpg');  //复制文件到新的路径
$disk->move('old/file1.jpg', 'new/file1.jpg');  //移动文件到新的路径
$size = $disk->size('file1.jpg');               //取得文件大小
$time = $disk->lastModified('file1.jpg');       //取得最近修改时间 (UNIX)
$files = $disk->files($directory);              //取得目录下所有文件
$files = $disk->allFiles($directory);               //这个没实现。。。
$directories = $disk->directories($directory);      //这个也没实现。。。
$directories = $disk->allDirectories($directory);   //这个也没实现。。。
$disk->makeDirectory($directory);               //这个其实没有任何作用
$disk->deleteDirectory($directory);             //删除目录,包括目录下所有子文件子目录

$disk->uploadToken('file.jpg');                     //获取上传Token
$disk->downloadUrl('file.jpg');                     //获取下载地址
$disk->downloadUrl('file.jpg')
     ->setDownload('foo.jpg');                      //获取下载地址,文件名为 foo.jpg
$disk->downloadUrl('file.jpg', 'https');            //获取HTTPS下载地址
$disk->privateDownloadUrl('file.jpg');              //获取私有bucket下载地址
$disk->privateDownloadUrl('file.jpg', 'https');     //获取私有bucket的HTTPS下载地址
$disk->privateDownloadUrl('file.jpg', 
                        [
                            'domain'=>'https',
                            'expires'=>3600
                        ]);                         //获取私有bucket的HTTPS下载地址。超时 3600 秒。
$disk->imageInfo('file.jpg');                       //获取图片信息
$disk->imageExif('file.jpg');                       //获取图片EXIF信息
$disk->imagePreviewUrl('file.jpg','imageView2/0/w/100/h/200');                          //获取图片预览URL
$disk->privateImagePreviewUrl('file.jpg','imageView2/0/w/100/h/200');                   //获取私有bucket图片预览URL
$disk->verifyCallback('application/x-www-form-urlencoded', $request->header('Authorization'), 'callback url', $request->getContent());//验证回调内容是否合法
$disk->persistentFop('file.flv','avthumb/m3u8/segtime/40/vcodec/libx264/s/320x240');    //执行持久化数据处理
$disk->persistentFop('file.flv','fop','队列名');    //使用私有队列执行持久化数据处理
$disk->persistentStatus($persistent_fop_id);        //查看持久化数据处理的状态。

laravel上传文件代码实例

/**
 * 七牛上传文件 FileUploadInfo
 * @author jiazhizhong <jiazhizhongphp@163.com>
 * @param Request $request
 * @return json
 */
public function FileUploadInfo(Request $request){
    $this->disk = \Storage::disk('qiniu');
    $data = [];
    // 获取到文件信息
    $file = !empty($_FILES['fileUpload']) ? $_FILES['fileUpload'] : [];
    if (empty($file)) {
        return '';
    }
    // 获取文件名
    $fileName = $file['name'];
    $TmpName = $file['tmp_name'];
    // 获取文件内容
    $fp = fopen($TmpName,"r");
    $contents = fread($fp,filesize($TmpName));
    $this->disk->put($fileName,$contents);                        //上传文件
    $data['url'] = $this->disk->getDriver()->downloadUrl($fileName);      //获取下载地址
    return $this->response('true',1,$data);
}

官方SDK / 手册

  • https://github.com/qiniu/php-sdk
  • http://developer.qiniu.com/docs/v6/sdk/php-sdk.html

转自:https://blog.csdn.net/fishermanmax/article/details/53059104

解决Mac OS X 11中的/usr/bin 的“Operation not permitted” 权限问题

更新了 Mac OS X 11后发现,不再能够通过Terminal用命令 cp 复制文件到 /usr/bin 了。
复制文件的时候出现权限问题:

cp: /usr/bin/mvim: Operation not permitted

搜索之后发现,是El Capitan 加入了Rootless机制,不再能够随心所欲的读写很多路径下了。设置 root 权限也不行。

Rootless机制将成为对抗恶意程序的最后防线

于是尝试关闭 Rootless。重启按住 Command+R,进入恢复模式,打开Terminal。

csrutil disable

重启即可。如果要恢复默认,那么

csrutil enable

apache 通过mod_fcgi 模块加载php

一,使用软件的详细版本信息如下:
http://www.linuxidc.com/Linux/2012-02/53418.htm
全部软件下载地址:http://yun.recallg.cn/s/ra8As549mQoJNMD
Apache/2.4.27

Apache FastCGI module(mod_fcgid/2.3.9)

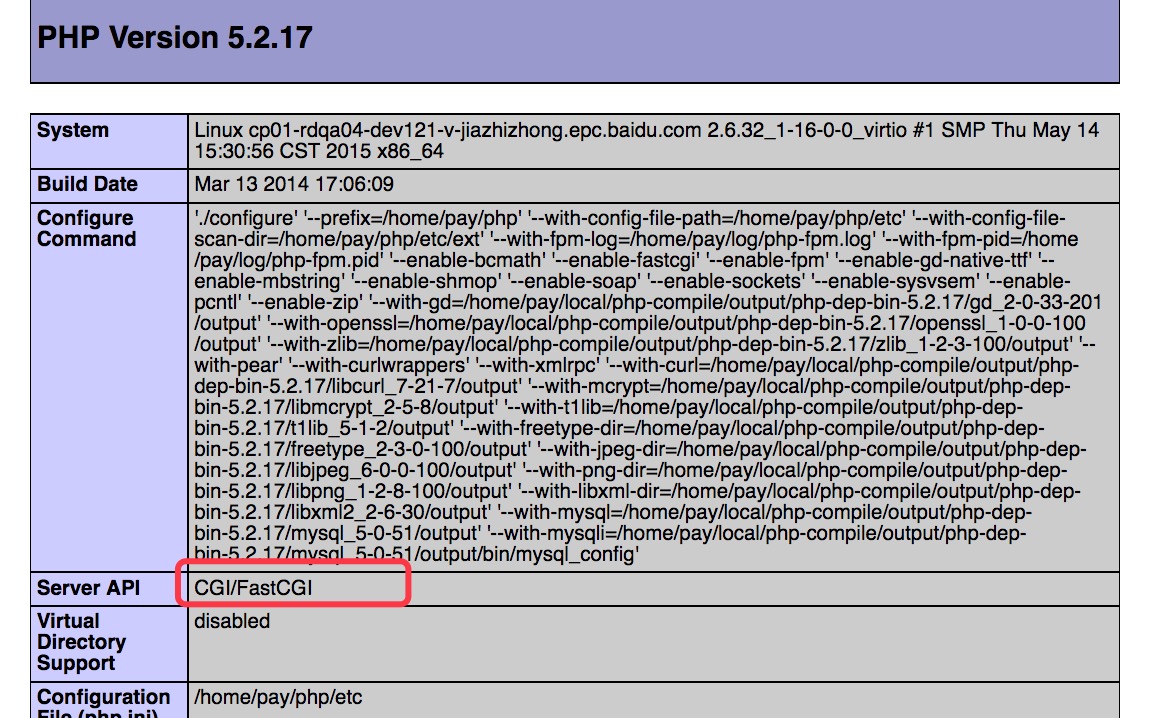
PHP 5.2.17(php-cgi)
php各个版本下载地址:http://museum.php.net/php5/

二,详细的配置步骤:

1,安装mod_fcgid模块

1)Apache 模块下载地址:
http://httpd.apache.org/download.cgi#mod_fcgid

2)从源代码编译安装

[root@cp01-rdqa04-dev121-v-jiazhizhong.epc.baidu.com pay]# APXS=/opt/httpd/bin/apxs ./configure.apxs
[root@cp01-rdqa04-dev121-v-jiazhizhong.epc.baidu.com pay]# make && make install

3)修改apache的httpd.conf,加载mod_fcgid.so模块

LoadModule fcgid_module modules/mod_fcgid.so

4)在httpd.conf文件中添加mod_fcgid模块配置

<IfModule mod_fcgid.c> 
    AddHandler fcgid-script .fcgi .php 
    # Where to look for the php.ini file? 
    FcgidInitialEnv PHPRC        "/home/users/test/php" 
    # Set PHP_FCGI_MAX_REQUESTS to greater than or equal to FcgidMaxRequestsPerProcess 
    # to prevent php-cgi process from exiting before all requests completed 
    FcgidInitialEnv PHP_FCGI_MAX_REQUESTS      1000 
    # Maximum requests a process should handle before it is terminated 
    FcgidMaxRequestsPerProcess       1000 
    # Maximum number of PHP processes 
    FcgidMaxProcesses             15 
    # Number of seconds of idle time before a php-cgi process is terminated 
    FcgidIOTimeout             120 
    FcgidIdleTimeout                120 
    #Path to php-cgi 
    FcgidWrapper "/home/users/v_jiazhizhong/php/bin/php-cgi" .php 
    # Define the MIME-Type for ".php" files 
    AddType application/x-httpd-php .php 
</IfModule> 

4)修改httpd.conf中的,添加在 Options Indexes FollowSymLinks后面添加Includes ExecCGI。修改后如下:

<Directory "/home/users/v_jiazhizhong/pay-finance-php/lib/index"> 
    # 
    # Possible values for the Options directive are "None", "All", 
    # or any combination of: 
    #   Indexes Includes FollowSymLinks SymLinksifOwnerMatch ExecCGI MultiViews 
    # 
    # Note that "MultiViews" must be named *explicitly* --- "Options All" 
    # doesn't give it to you. 
    # 
    # The Options directive is both complicated and important.  Please see 
    # http://httpd.apache.org/docs/2.4/mod/core.html#options 
    # for more information. 
 
    Options Indexes FollowSymLinks MultiViews Includes ExecCGI 
    AllowOverride None 

    Order allow,deny 
    Allow from all 
    # 
    # AllowOverride controls what directives may be placed in .htaccess files. 
    # It can be "All", "None", or any combination of the keywords: 
    #   AllowOverride FileInfo AuthConfig Limit 
    # 
    AllowOverride All 

    # 
    # Controls who can get stuff from this server. 
    # 
    Require all granted 
</Directory> 

5)配置好httpd.conf文件后保存,重启Apache,
phpinfo.jpg